Saturday, February 23, 2013

New Year's Resolutions - Organization!


Oh yes, it is now late February and I am slowly trying to tackle all of those New Year's Resolutions that are ever so patiently pending my completion.  I pride myself in being organized and on top of things, it is one of my strong points....well most of the time.  Since expanding our family a few months back I have felt like I have been slowly drowning in this area of daily life.  Piles of papers and magazines are a plenty at our house.  My once organized life, home and work have now taken a blow.  In a splendid, happy, positive way. 

The other day I decided enough is enough I needed to start checking off my list of resolutions and start the organization showdown.  If any of you have young children you will completely relate with this particular resolution that I have made: to organize and edit all of those fun art projects that come home in your little ones backpacks.  Daily doses of Kindergarten excellence!   I remember as a child that my mother had collected and stored many of my projects and kept them in a box in our attic.  I never knew why until one day I decided to dig through that box.  WOW what memories come back.  Now I understand.  And now it is my turn to create this memory for my little ones.  


I decided to tackle my organization by being simple, colorful and economical.  Using standard 3 ring binders and sheet protectors I collected the bevy of art projects and quickly began my quest.  I organized the projects by the time of year/month they were created.  I teetered back and forth trying to come up with a creative way that I could label the binders so that I would know what year the projects were completed.  Using scrapbook paper and stickers I simply created a label for the spine of the binder spelling out "art projects" and the year they were completed. 

I ran into a snag though.  Once I started 2012 I quickly realized that I would have projects that were created in different school years, Preschool and Kindergarten.  I wanted to differentiate between the advancement in technique and curriculum, so I started a binder specifically for Kindergarten.  I plan on creating binders that correlate with the grade in which they were created and not by the calendar year.  What a fun way to showcase my little one's artwork without it cluttering up a dark shelf deep in the gallows of the closet. 

Sadly I think that I will only be making and filling these type of "art project" binders for the next few years.  Once Junior High comes I'm fairly certain that I will not be the recipient of many "cotton ball Santa beards" any more.    


  xo T.

Monday, December 31, 2012

Celebrate 2013

With the clock ticking down and the New Year upon us there is a whole new list of goals and achievements to accomplish, 
let's take time to remember the most important part of our lives.....
our families!  
Be thankful and cherish each and every tiny moment of our lives and relish in its unique beauty.  

Here's to a bright New Year!


xo T

Wednesday, December 12, 2012

Nursery Couture


Oh Baby!

Nursery design can be tricky. Babies grow into kids so quickly that finding a color and furniture combination that will evolve easily requires some forethought.

I recently had my second child, a beautiful little girl. My first was a boy and believe me, he's all boy! Bold colors and geometric furniture for him all the way. But what to do for my soft and cuddly little newbie? I knew I would reuse the black crib and changing table/dresser combo from Pottery Barn (circa 2006), which was my son's.  Pregnant with a business to run, a busy kindergartner and a near-pro cyclist for a husband, my energy level was maxed. I was just going to leave the walls a pale gray but my husband just couldn't put his baby girl in a GRAY room.

As I pondered paint color I fell in love with these baby animal wall prints. I selected the giraffe, monkey, white tiger and duck from The Animal Print Shop.

So sweet and innocent: Framed in a simple white frame from IKEA

All nurseries need a place to rock, feed and read to a baby. My glider fit the bill but it needed something next to it.


My search ended at HomeGoods where I scored this petite Victorian nightstand with crystal pull (a detail that complemented the delicate crystal chandelier I hung on the ceiling).


Baby books fit neatly underneath the nightstand in a bin.


I settled on a pastel lavender paint (choose a no VOC/natural paint to ensure limit chemical exposure to your little one). I echo the lavender paint with some of the soft goods, such as the diaper holder.

The addition of a simple white molding about 1/8 of the way down from the ceiling helped pull it all together.


Finally shoe storage (well, display for now), as a snap with this L-shaped shelf unit in black.

A fluffy white rug softened any coldness from the black furniture, making the whole room feel calm and relaxing.

Has my design worked? Is she calm? Yes. Well rested? For sure.

Perhaps I need to sleep in her room. Maybe I would feel more rested...


Monday, October 8, 2012

Pop Up Boutique

This Friday, October 12 needs space on your calendar!


Looking for a perfect gift for a special friend? Searching for an accessory that will bring your latest interior makeover alive? Want an excuse to meet some friends for a little shopping and nosh? No matter your objective or price point, our Pop Up Boutique event at EK Studios, 3233 South 900 East, SLC is not to be missed! Come see what Tracee G Design, Elizabeth Kimberly Design and Caitlin Creer Interiors has found in our travels and brought back to Salt Lake City.

I hope you'll forward this to your friends or post to Facebook. See you Friday!

ONE DAY ONLY! 

Friday, Oct. 12 from 10 am to 8 pm 
Latest Accessories | Unique Gift Ideas | New Furniture
Clothing | Artwork | Rugs 
Bring your friends!


Thursday, June 14, 2012

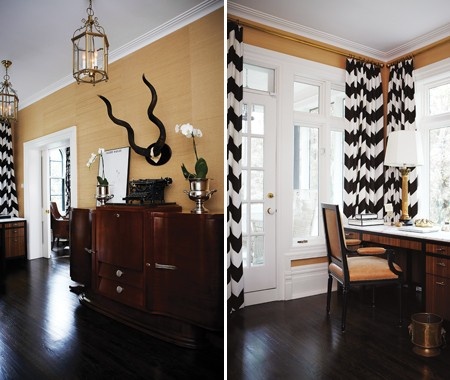
Intensely chevron


Chevron Obsession

Limey green fabric
I've been going bananas over the age old pattern of the chevron. It's distinct inverted 'V' established wide recognition in ancient crests and flags. I have been a fan for years and I don't even have a coat of arms!

I've incorporated this pattern in many a project and now all of the attention it's receiving has me jumping for joy. It's one of the most versatile patterns to use. It's simplicity can either be joined in a contemporary setting or paired with a traditional motif. Either way the style, design and scale is a home run.

Chevron patterns are popping up all over the place. Check out these examples:

Gap.com

Minimal scale at One Kings Lane

Photos via Pinterest

Rugs

Gorgeous Contemporary Cake

Buckley Chevron Berry Bowls

Adding a personalized monogram ... even better!


Tractor trailers ... yes you did read that right. The semi-trucks are not going to be out done. They too, have joined the revolution. Pristine white and chromed out semi-truck and trailer with the ever gorgeous chevron pattern

Are you on board?

Wednesday, April 25, 2012


Designer Sale......SAVE THE DATE!


Time to "spring clean" the Design Studio.
I am teaming up with the other designers in our design studio to
offer a great selection of designer furniture and accessories.
Come join us and enjoy our Spring boutique.
Catch a glimpse of our office space and score some great deals for your space.
There will be new and gently used items at every price point.
Mark May 4-5 on your calendars and spread the word!


Monday, March 5, 2012

St. George Parade of Homes

As I previously posted I have uploaded a handful of pictures 
from my install in St. George for the Parade of Homes.  
So here goes......


I am really fond of this shot taken directly in front of the kitchen table and looking towards the built in buffet.  This space was rather tight but I was able to pull it off and create a formal dining feel even though this space is adjacent to the kitchen.  Of course selecting a round table really helped the overall flow and movement for this area.  Side note: if you are limited on space look for a smaller round table to work for your everyday living but can also extend with additional leaves to provide more seating when you are having a get together.


Here is another shot of the kitchen table area looking into the adjoining living room.  This particular floor plan and space allocation, for this twin home, is a rather smart use of space.  Each space is large enough to feel open but also provides a cozy comfortable feel.


Kitchen nook looking into the adjoining living room.  The overall color scheme is one that is light and calm which helps to create a flow from one area to the next.


Tucked into the far corner of the living room is a comfy stylish reading chair.  This chair stands alone in the space but is a welcome addition next to one of the "grandma" cabinets that flank either side of the fireplace.  I am enamored with how simple and understated this area turned out and also how inviting it can be at the same time.


Upstairs the loft area has a hipper younger vibe.  The loft is a multi-use space with a bar area for entertaining, TV lounge area and a play area.  Adding a little spunk and energy to this space is the bold splash of tangerine orange.  It did the job!


Another angle of the lounge area in the loft.


Standing in the entry you catch a glimpse of the stairs that lead you to the loft.  
Beyond that is the kitchen living area.
Again simplicity has ruled the overall design of this project.


Special thanks to my co-collaborator Jenny Wright.  We had such a fun time working along side each other through the entire process starting last year with the material selections and continuing all the way through the finishing touches of the installation.

I hope you enjoy!

Tracee